
Integrations
Connect Airtable
Sync inventory and projects straight from your Airtable bases. It takes about 3 minutes: create a read-only token in Airtable, paste it into RackStack Pro, and pick a base.
Before you start
You need to be an owner or admin of your RackStack Pro organization to manage integrations. The token you create is read-only and stored encrypted.
Part 1 — Create an Airtable token
RackStack Pro connects using an Airtable Personal Access Token — a read-only key you generate in your Airtable account.
- 1
Open your Airtable account menu
From your Airtable Home, click your account avatar in the top-right corner.airtable.com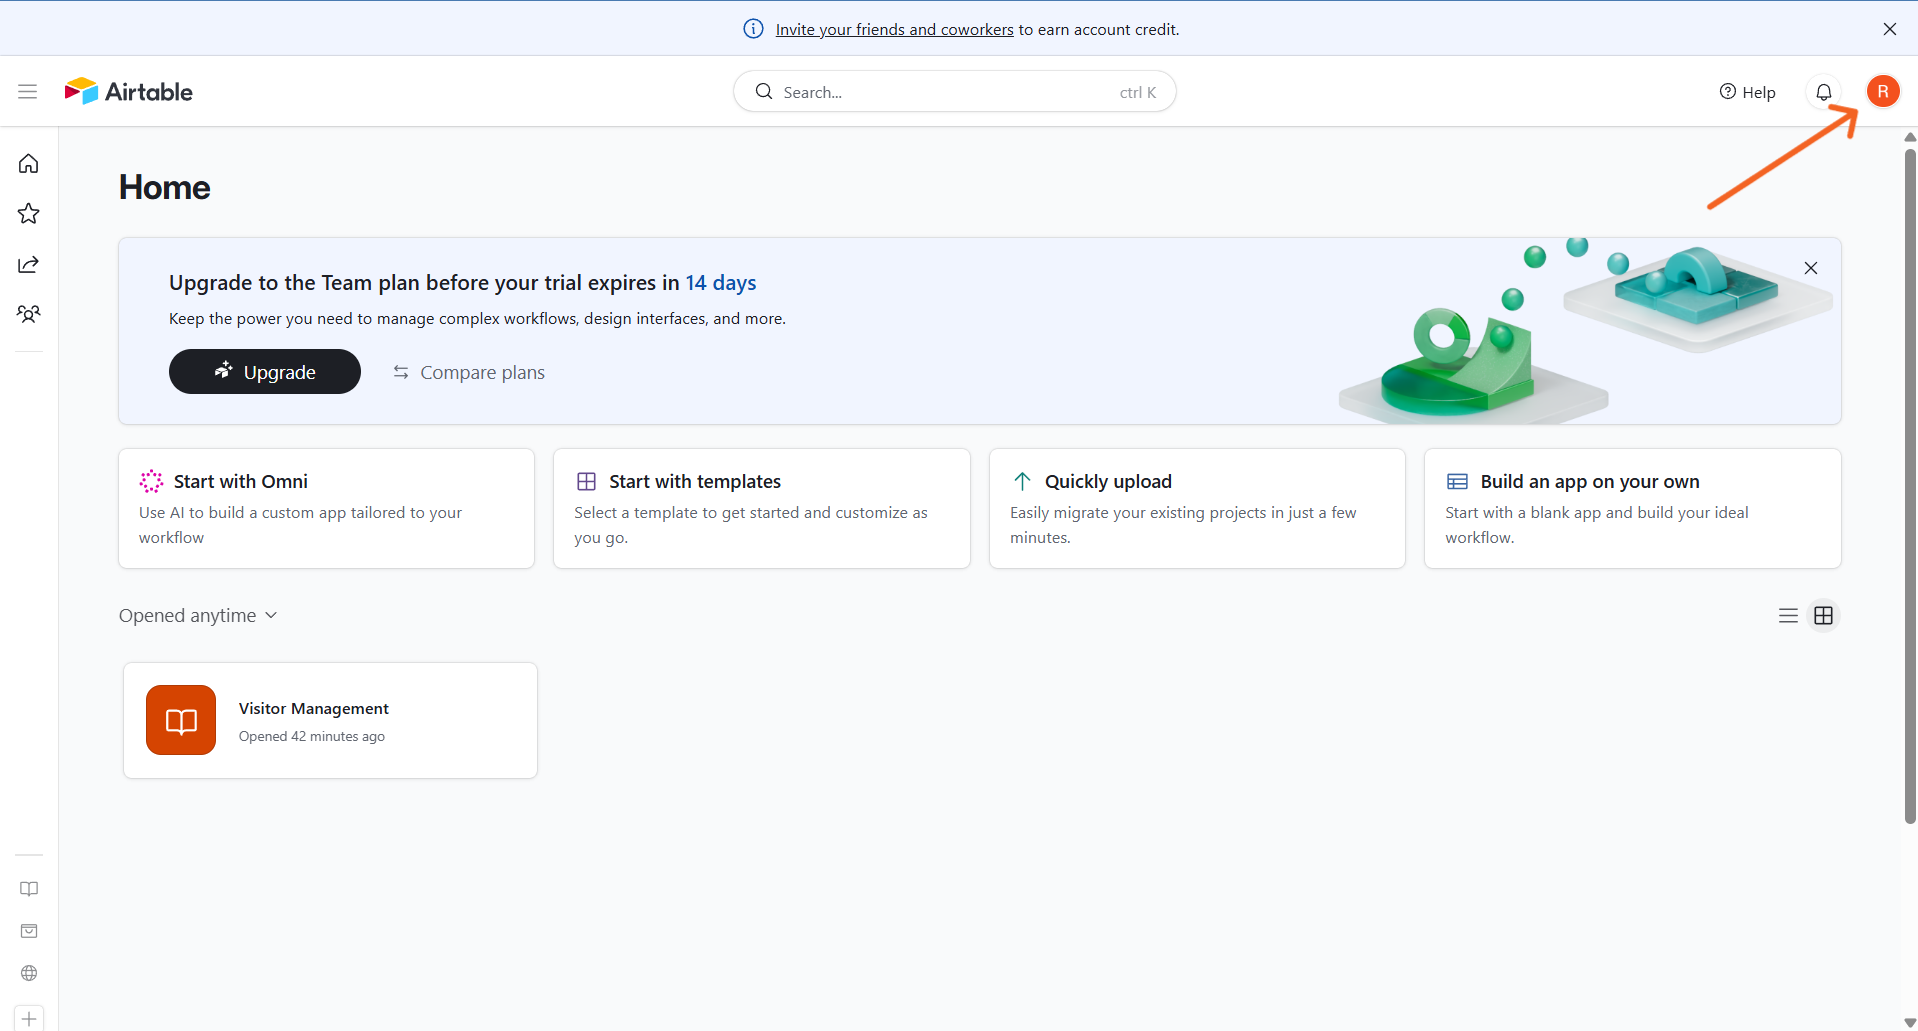
Airtable Home — click your avatar (top-right) - 2
Go to the Builder hub
In the menu, click Builder hub, then open Personal access tokens under Developers.airtable.com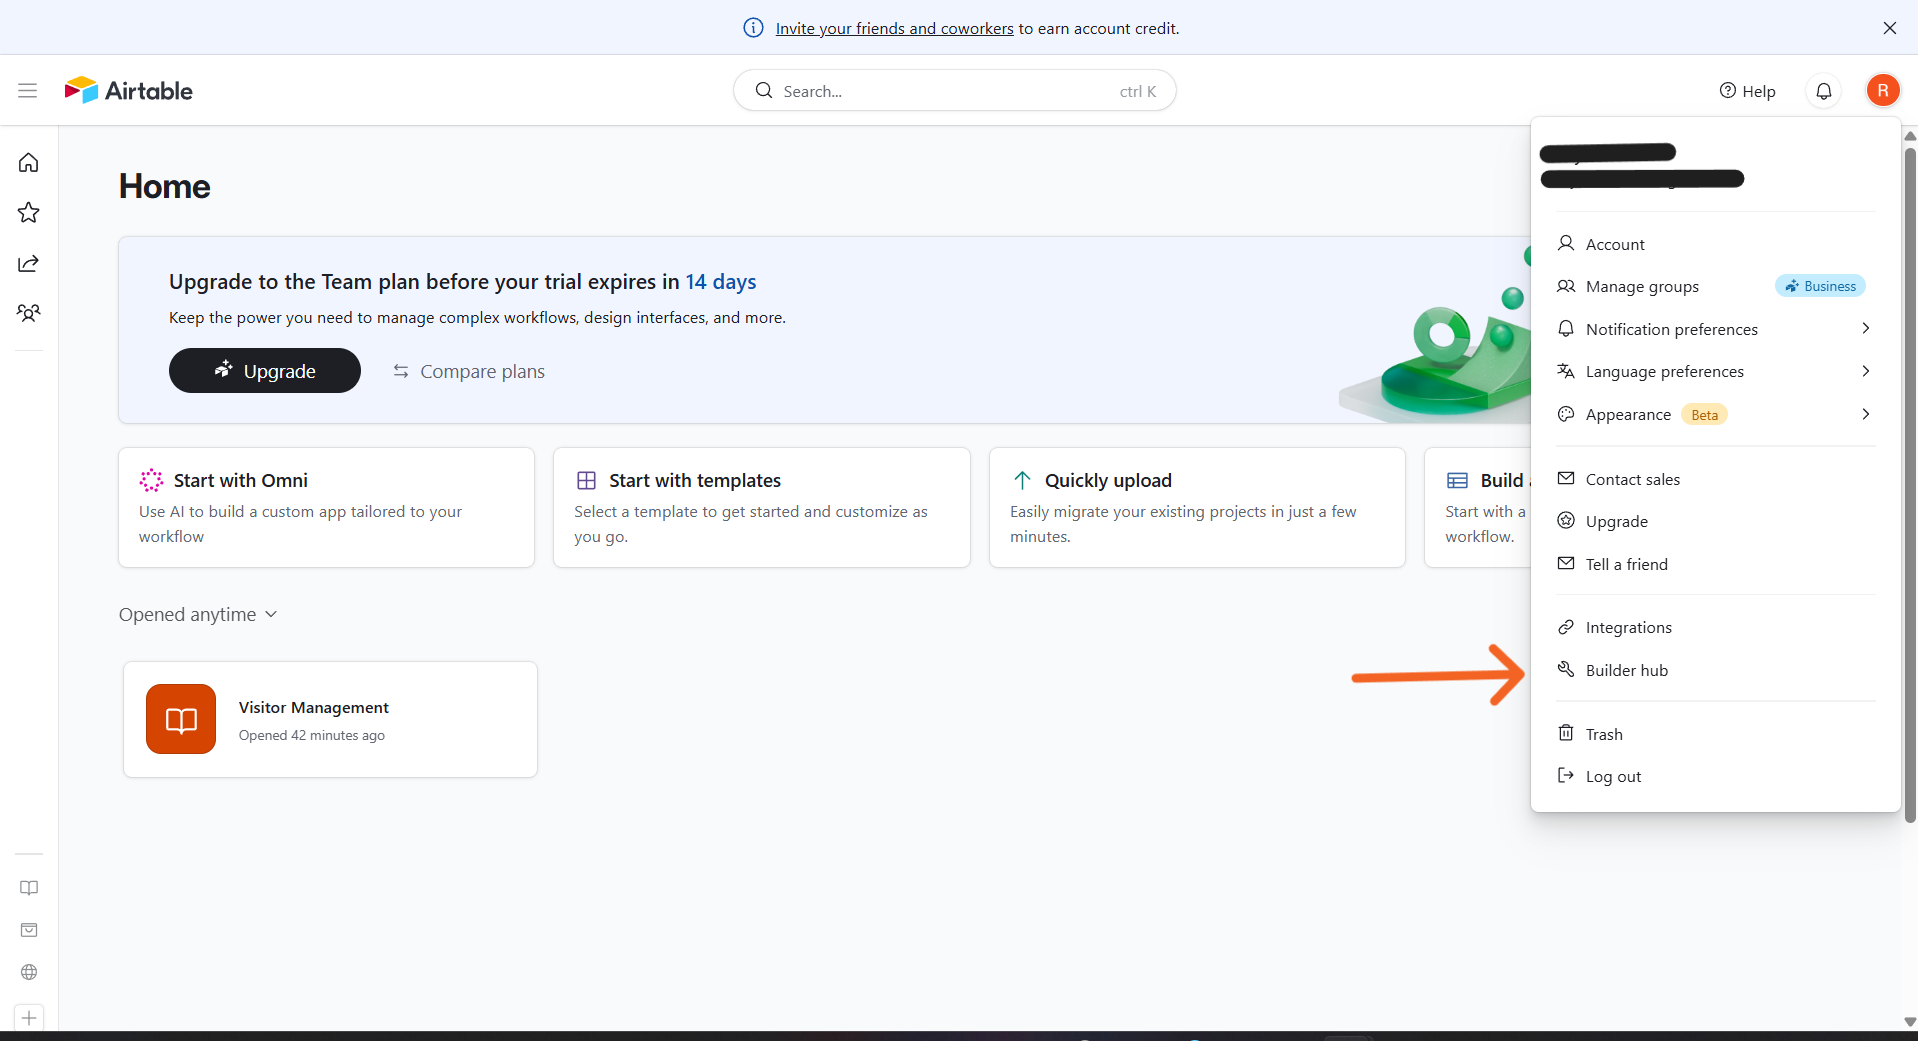
Account menu — choose Builder hub - 3
Create a token
On the Personal access tokens page, click Create token.airtable.com/create/tokens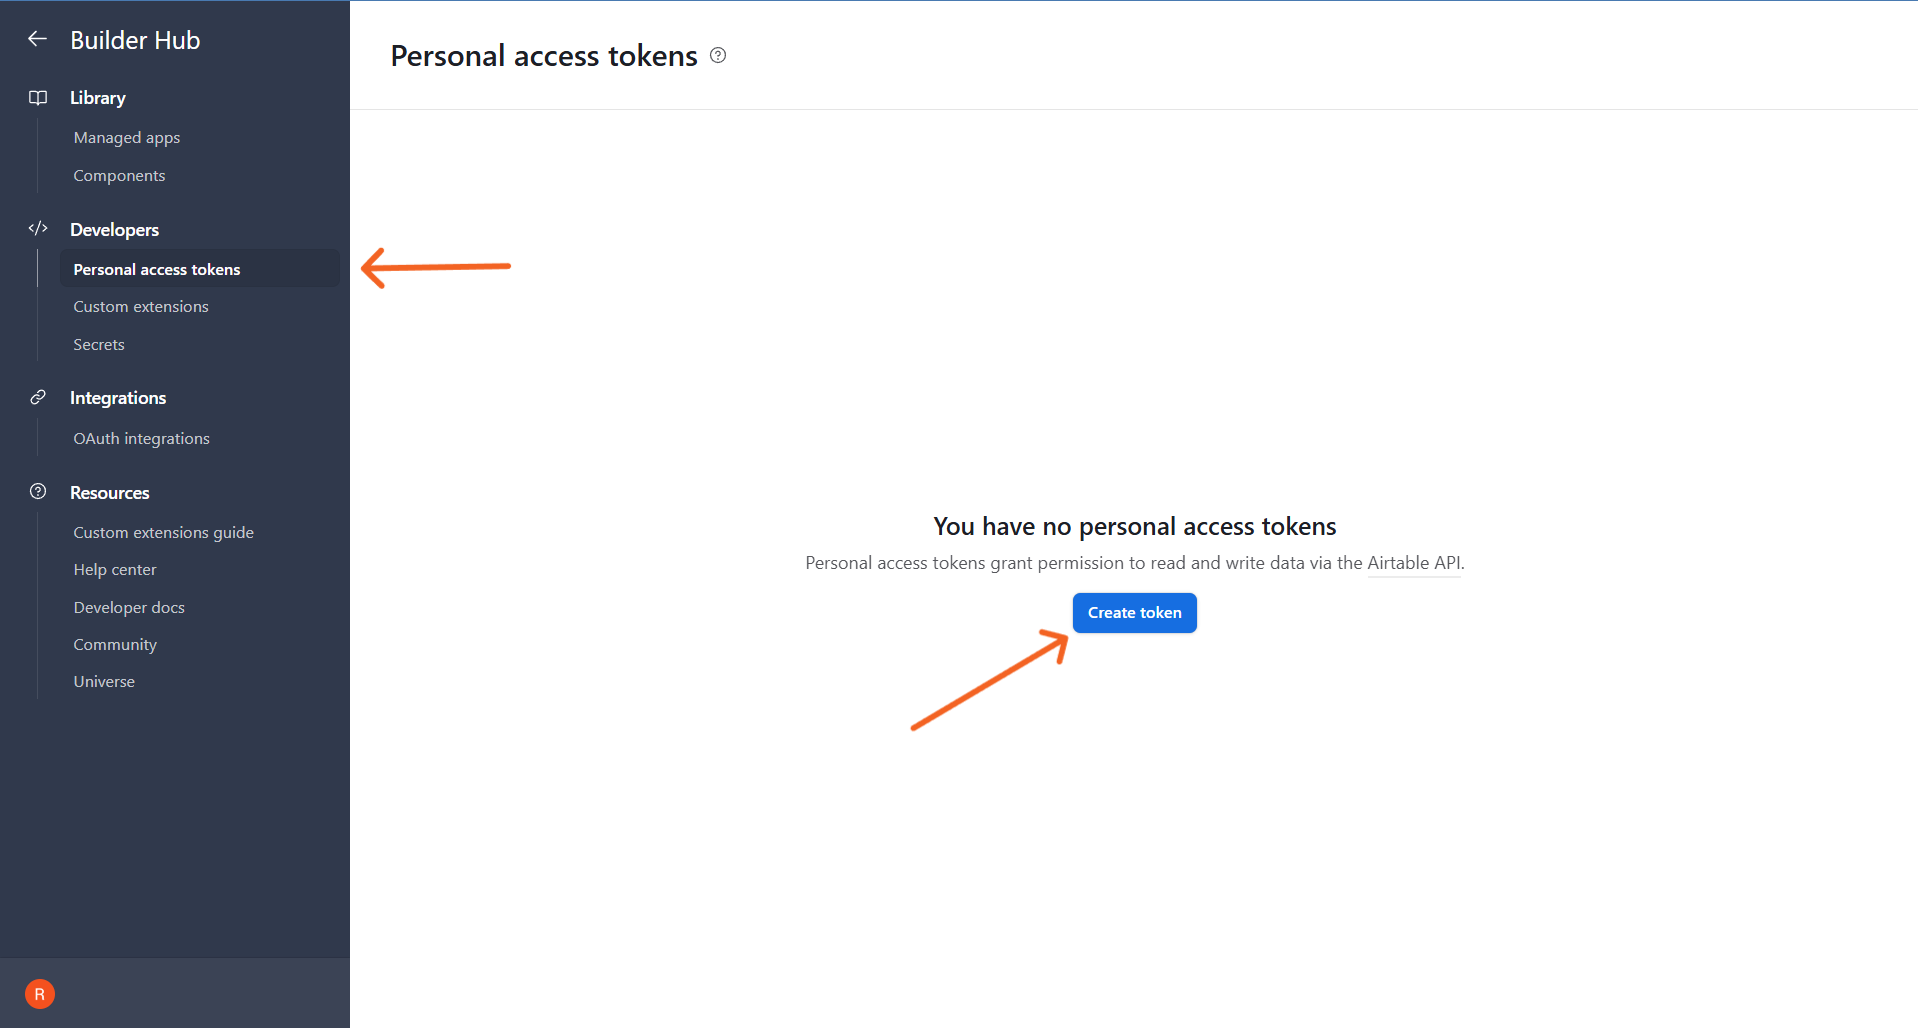
Personal access tokens — click Create token - 4
Name it, grant all bases, and add the scopes
Give it a name like RackStack Pro. Under Access click Add all resources so the token can read every base you have — now and in the future — so one token covers all your projects and you never make another when you add a base. Then click Add a scope and add these two:data.records:readschema.bases:read
airtable.com/create/tokens/new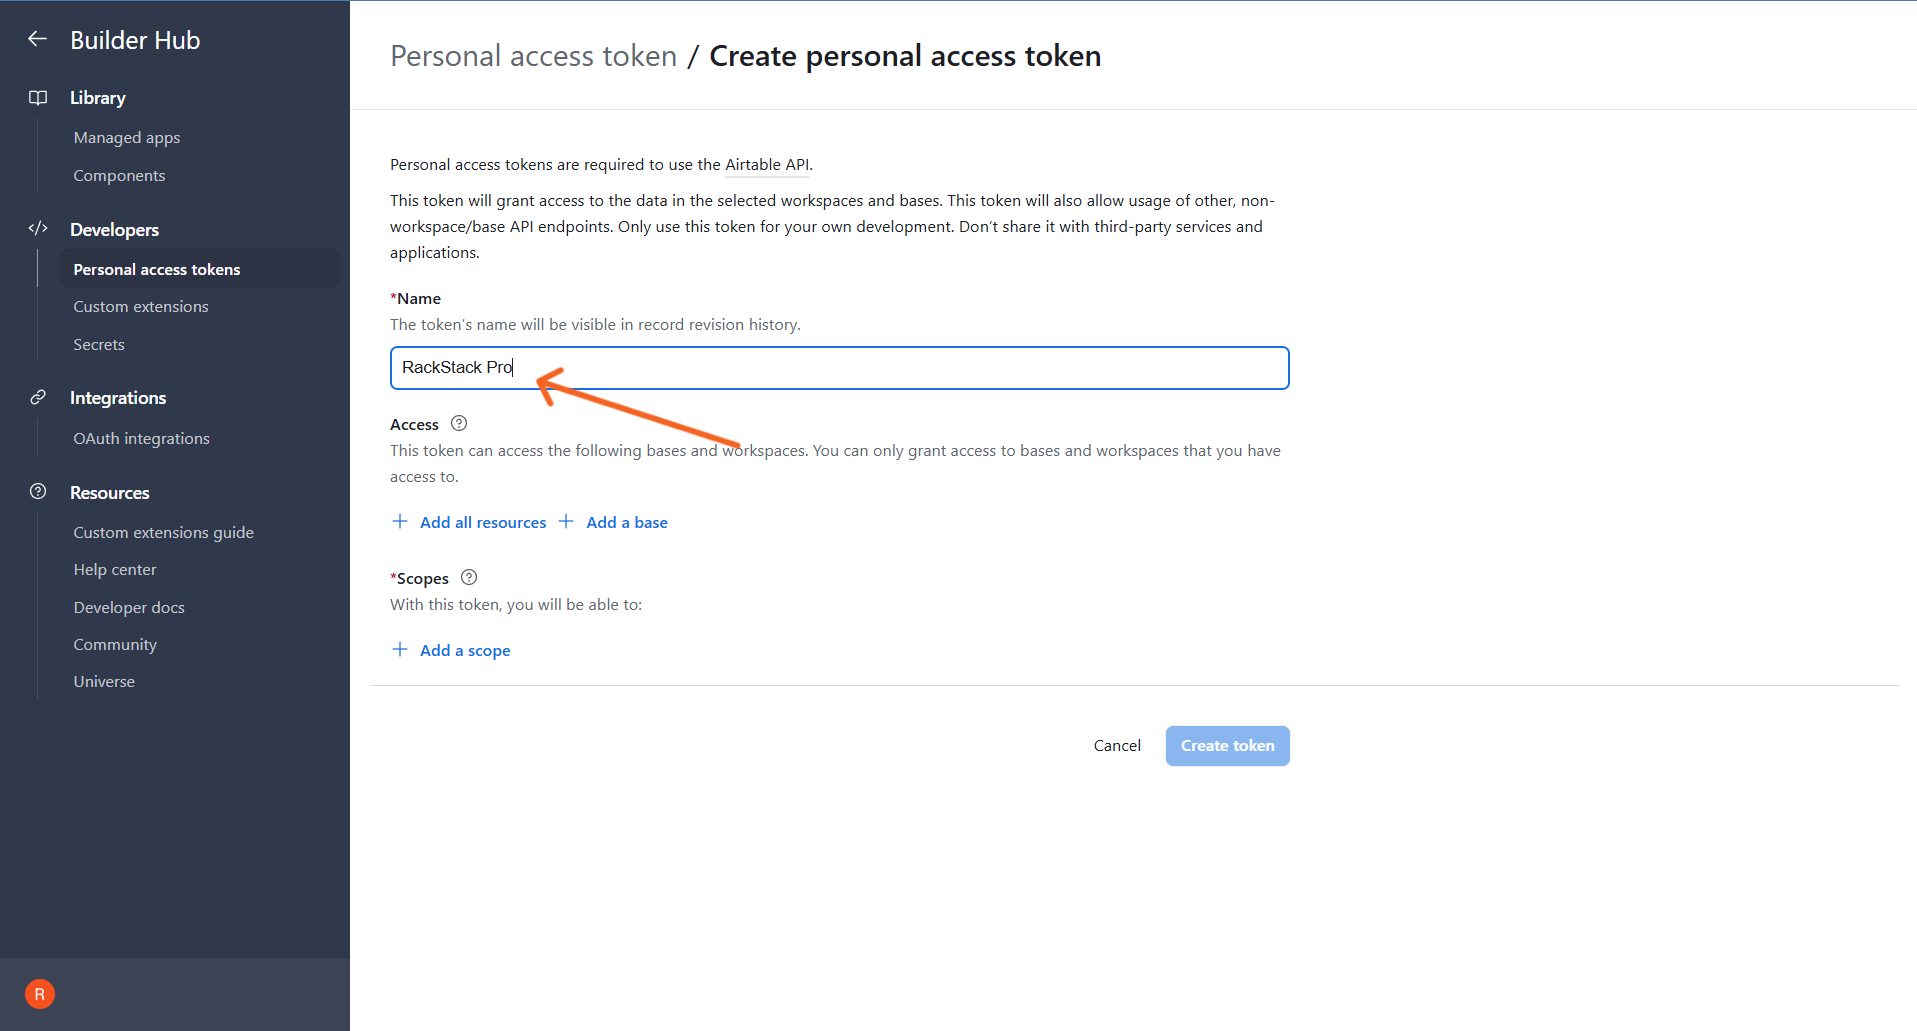
Name the token, then Add all resources and Add a scope - 5
Create the token
With All resources and both read scopes set, click Create token.airtable.com/create/tokens/new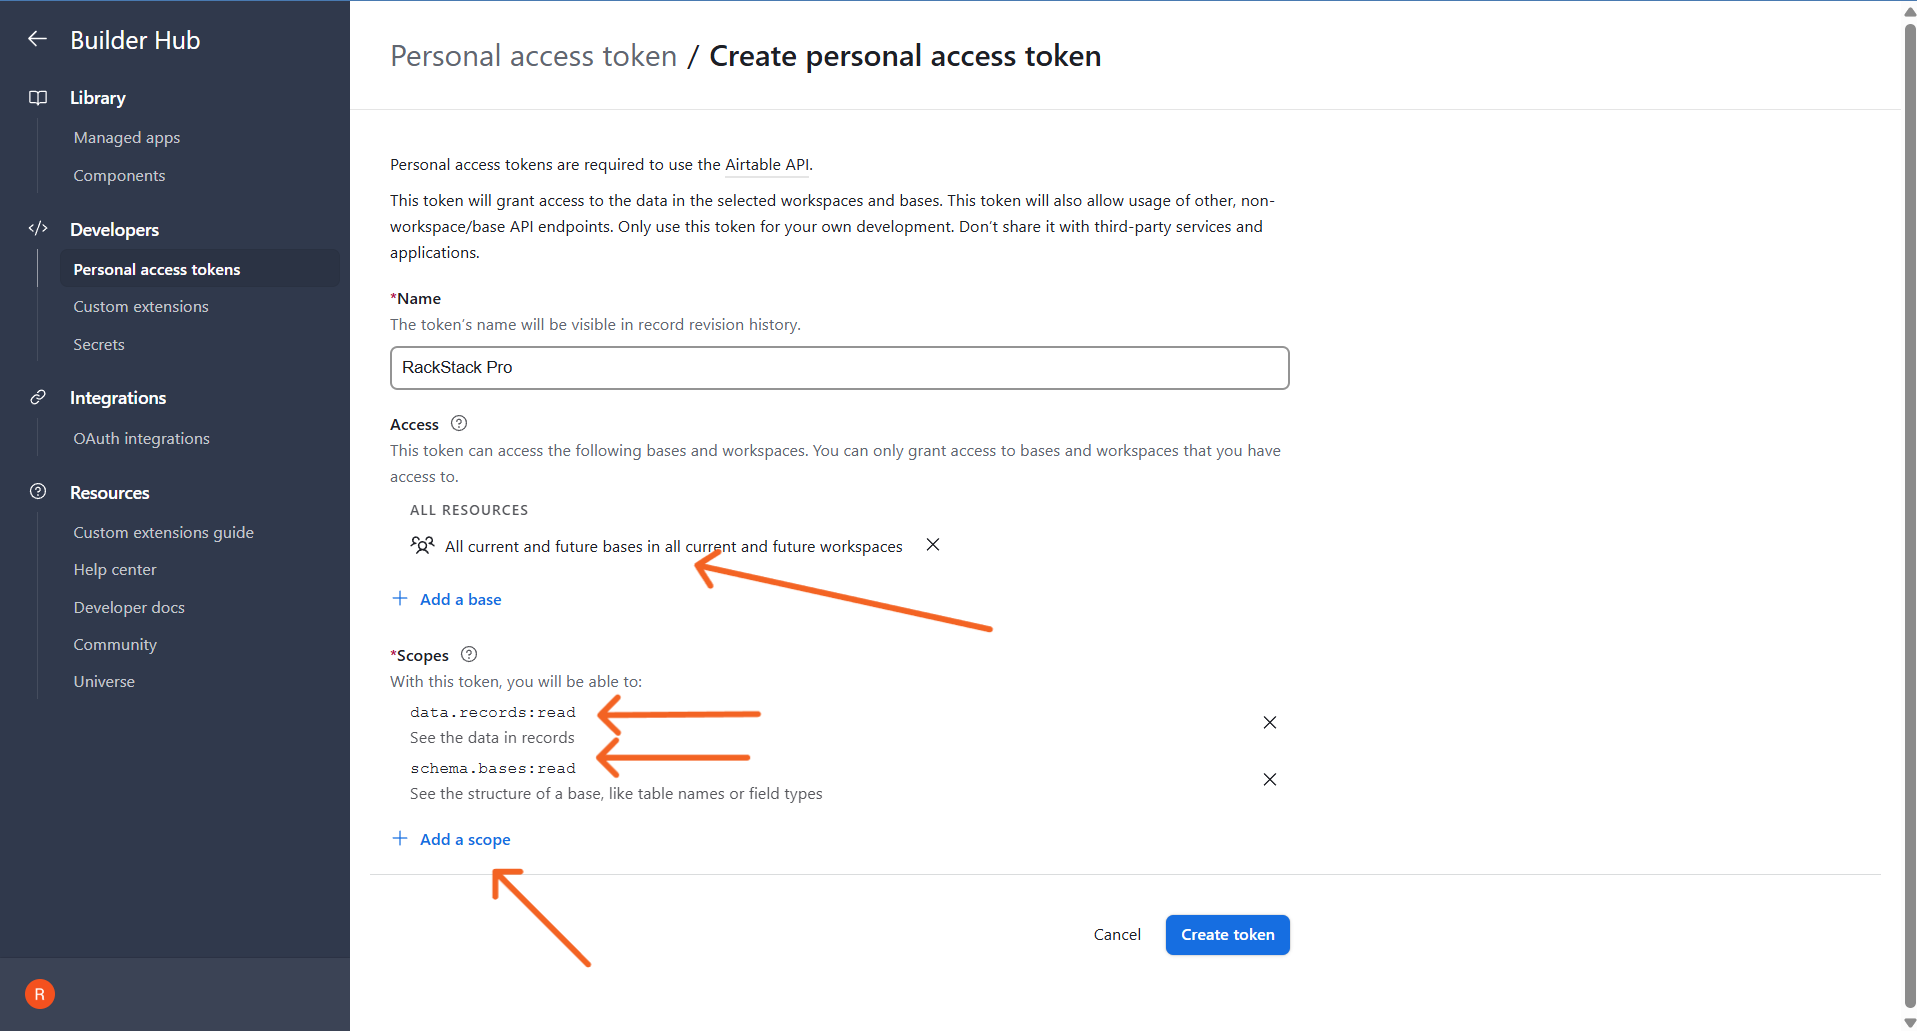
Both scopes + All resources set — click Create token - 6
Copy the token
Airtable shows the token once. Click the copy icon and keep it handy — you’ll paste it into RackStack Pro next. It starts withpat….airtable.com/create/tokens/new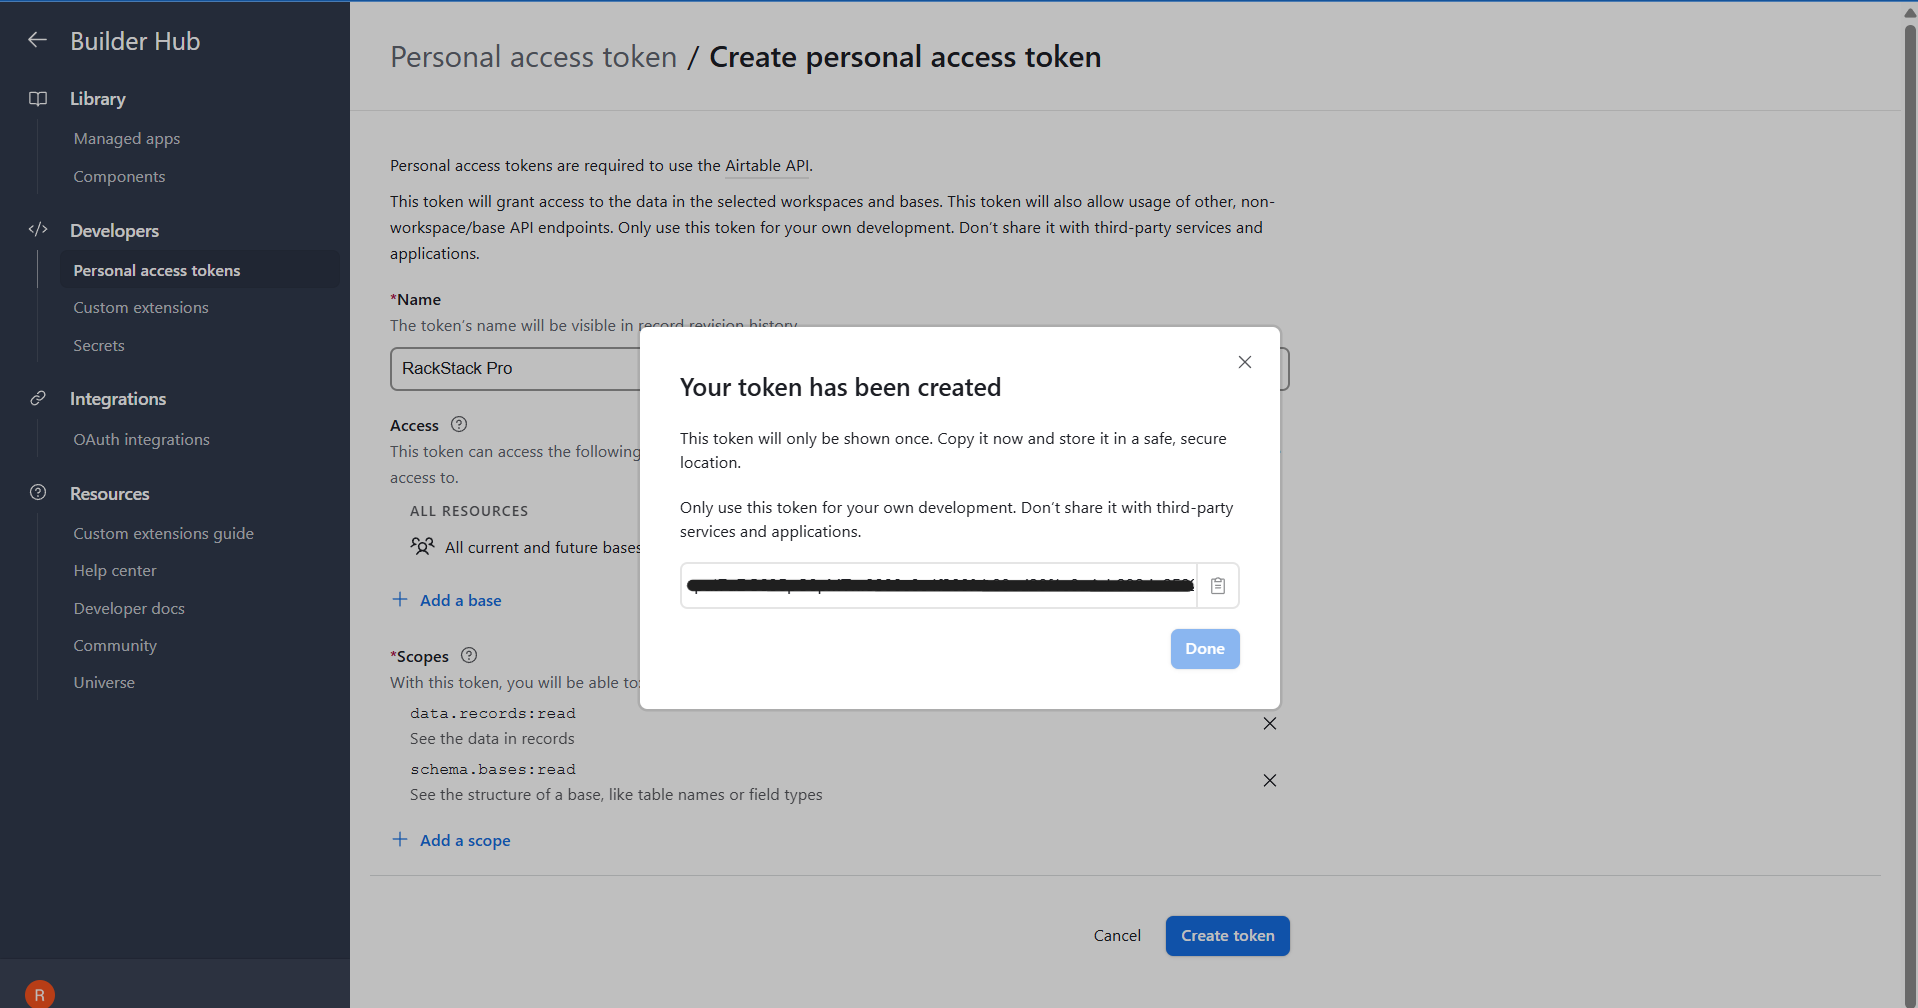
Copy the token — it’s shown only once
Keep your token private
Your token is a password to your Airtable data — never post it publicly or paste it into a screenshot you share. Airtable shows it only once; if you lose it (or expose it), delete that token and create a new one.
Part 2 — Connect it in RackStack Pro
- 1
Open the Integrations settings
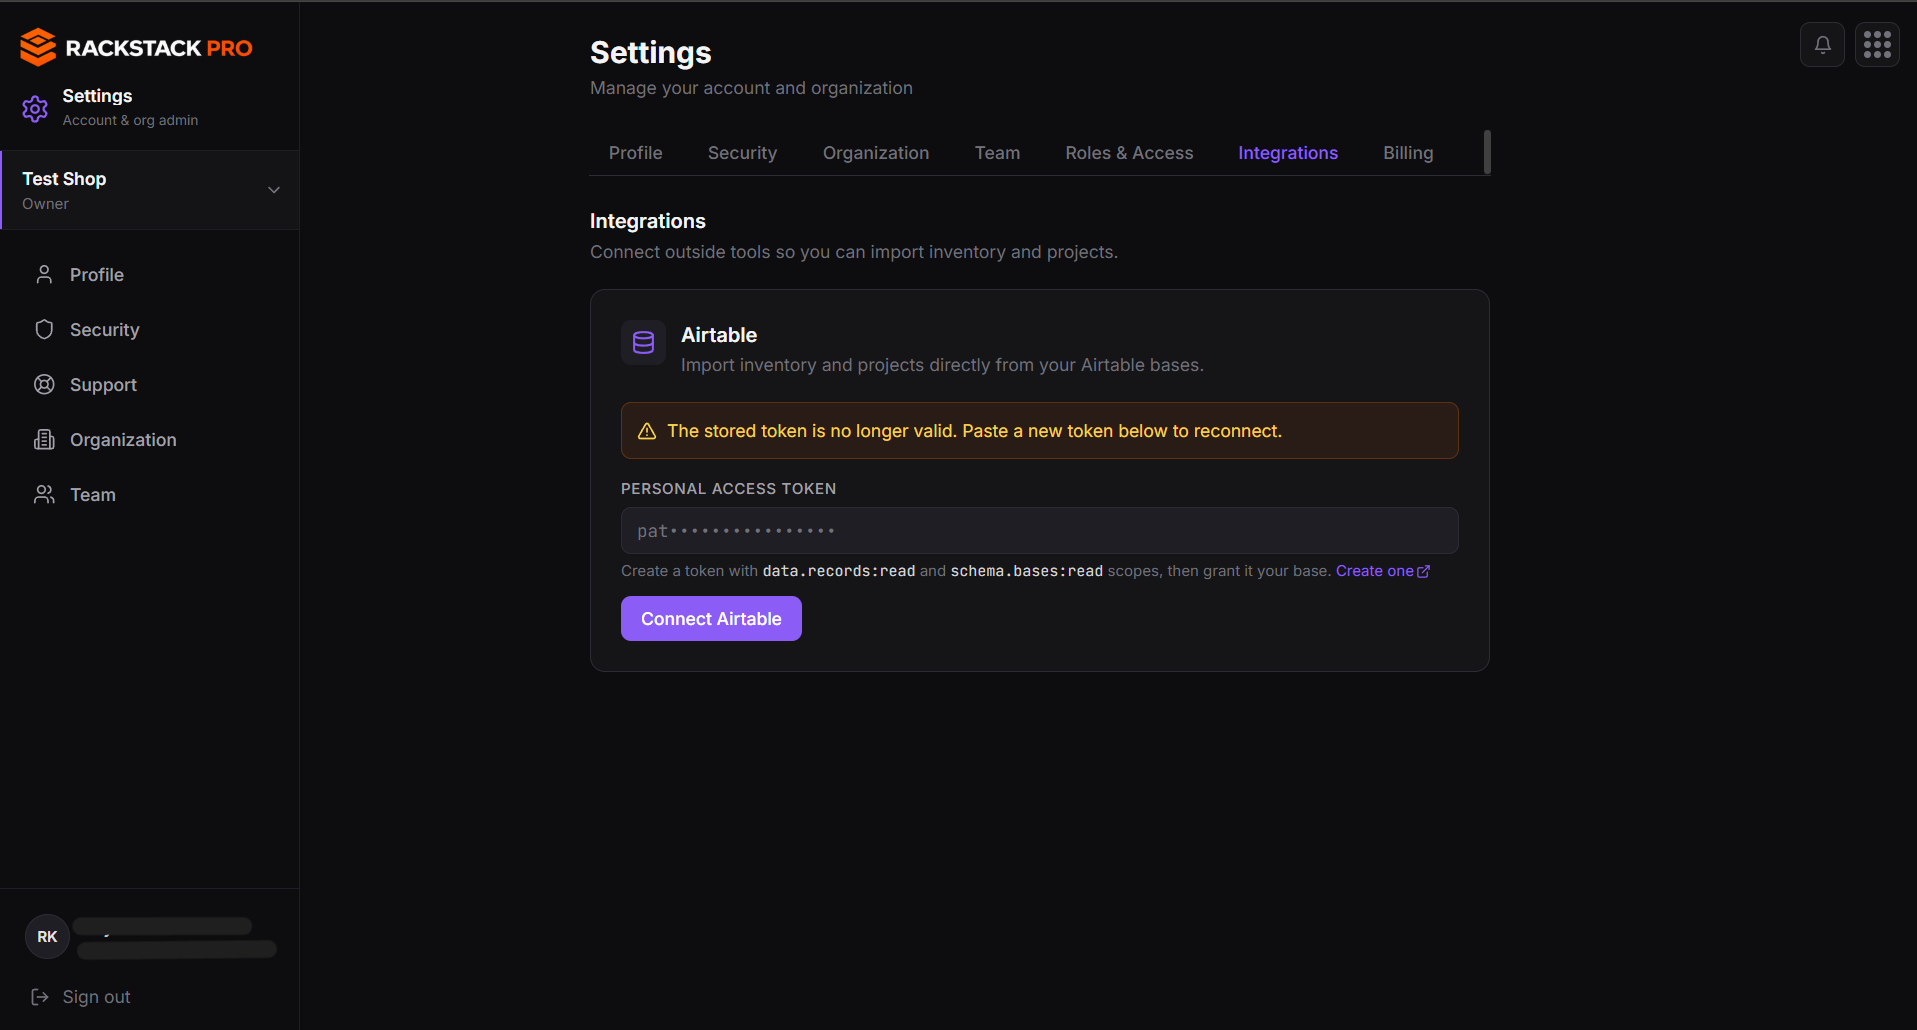
In RackStack Pro, go to SettingsIntegrations. On the Airtable card, paste your token into Personal Access Token and click Connect Airtable. - 2
Choose your base
Once connected, a Base dropdown appears listing the bases your token can see. Select one and click Use base. RackStack Pro shows how many tables it found.
Part 3 — Import your data
Inventory: go to InventoryProducts, click Import, choose the Airtable tab, pick the table with your products, and click Import from Airtable.
Projects: go to Projects, click Import, choose Airtable, pick a table, optionally set a project name, then Import project.
Import inventory
How fields are matched
RackStack Pro matches your Airtable field names to its own columns automatically — you don’t have to rename anything, but closer names map more cleanly.
- Inventory: fields like
Name,SKU,Quantity/Stock On Hand,Cost,Supplier,TypeandTagsare recognized. A record whose SKU matches an existing product updates it — so re-importing is a sync, not a duplicate. - Projects: each record becomes a task. A
Section/Status/Groupfield becomes the task list, andStatus,PriorityandDue datemap automatically.
Re-syncing later
Run the import again anytime to pull the latest from Airtable. Matching SKUs update in place; new records are added.